DIY Translucent and colorful polymer clay jewelry
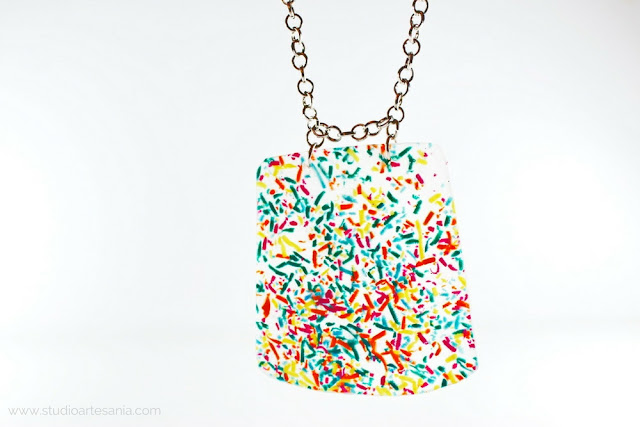
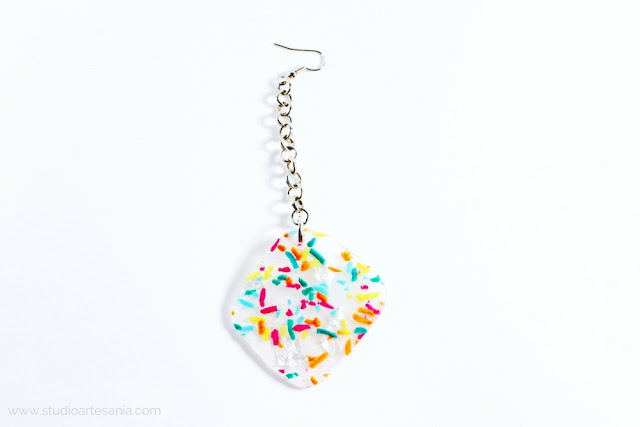
Liquid polymer clay, as you will learn in this tutorial, is more than just a bonding agent for two pieces of baked polymer clay or attaching findings. There are many techniques where you can use liquid clay, and with this pendant, I will show you just one of them. I also made two differently shaped earrings (yes, I'm a weirdo who likes to wear just one statement earring) as an additional example of this technique.
To add a bit of color I used polymer clay pieces that I have from the previous project. To make those chunks read steps from 2 to 4 in my tutorial for the Cookies-looking Easter eggs table decoration.
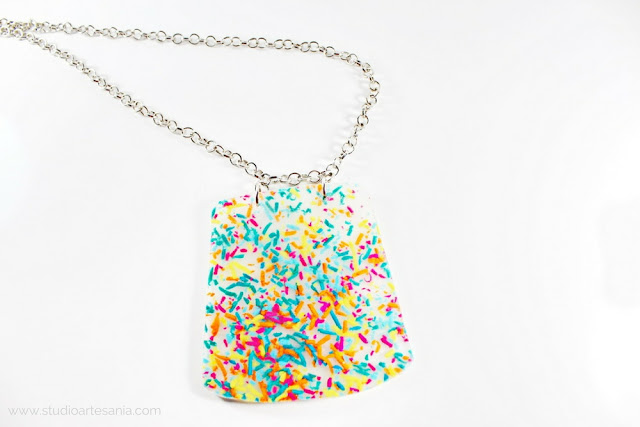
To archive transparency, it's best to use a heat gun, but for those that do not have this tool, there is an explanation how to make this jewelry using the oven in the tips section of the tutorial. The earrings are made using the heat gun, and the pendant is made using the oven. As you can see they are equally translucent. They are so translucent that photographing them was quite a challenge.
If you haven't work with a heat gun before or you just got this tool, read this tutorial before you start making this pieces of jewelry to get more familiar with its use. To make those pieces of jewelry you can use whatever brand of clear liquid clay you want, but in my experience, the best results are with Fimo Liquid and Sculpey Clear, especially if you will cure it in the oven.
Materials and tools
Liquid polymer clay
Polymer clay chunks in various colors
Ceramic tile
Painting spatula knife
Heat gun
Oven
Scissors
Piercer
70 % Rubbing alcohol
Cotton pads
Paper towels
Jewelry findings (jump rings, earrings hooks, chain, clasp)
Jewelry pliers
Silver metal leaf (optional)
Silver glitter (optional)
Step 1.
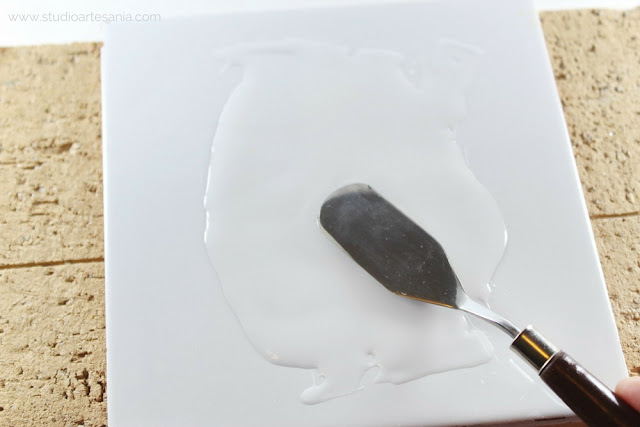
Before you start, wipe your ceramic tile and the spatula with rubbing alcohol. You want to have perfectly clean tile and tool because at the end every single grain of dust or dirt will be obvious. Pour the liquid polymer clay on the ceramic tile. Amount of liquid clay depends on the size of your tile. Mine is 15x15 cm (5.9x5.9 inches) so I poured about one tablespoon of liquid clay to make sheet approximately same size. If your ceramic tile is bigger you can pour more liquid clay and make bigger clay sheet.
Step 2.
Spread the liquid clay on the tile using a spatula, ensuring that the coating is evenly thick. You want that your sheet is about 1 mm (0.03 inches) thick. If necessary add more liquid clay, or if you overdo it scup the excess with a clean spatula and carefully return it into the bottle (you will need to unscrew the bottle cap for this). Leave the clay on tile aside for several minutes to level up.
Step 3.
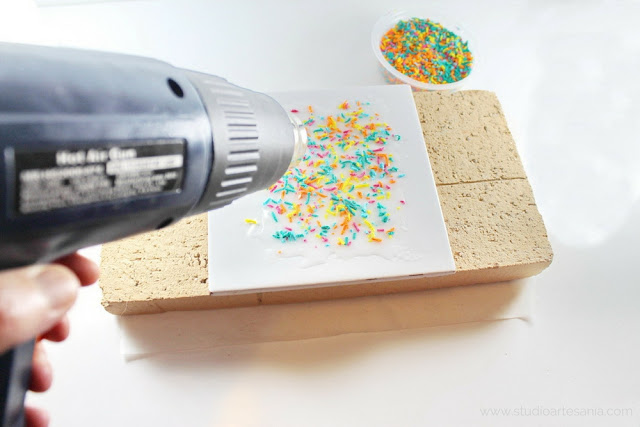
For the pendant, I've spread chunks all over the liquid clay, but for earrings, I leave some spots uncovered so they are more see through. Keep in mind that during the curing with a heat gun, due to the blowing of hot air, the liquid clay will spread little more and that chunks will sink into it.
Step 4.
Cure the clay sheet with a heat gun. When you notice that the liquid clay is a transparent turn off the heat gun and set it aside in a place where it can't burn or melt something. Let the sheet and tile to completely cool. Do not remove the clay sheet from the tile after cooling.
Step 5.
Pour some more liquid clay on the cooled sheet. You'll need about the same amount of liquid clay as for the first layer.
Step 6.
With a clean spatula spread evenly the second layer of liquid clay on the cured sheet. Let it level up for several minutes, and cure it with a heat gun. When you notice that the sheet is a transparent turn off the heat gun. Again leave everything to cool down completely, and do not remove the clay sheet from the tile.
Step 7.
Apply the third layer of liquid clay, spread it evenly with a spatula. At this point, if you want to, you can add parts of silver leaf or sprinkle it with silver glitter, or both. Do not overdo it with glitter or leaf because it will affect transparency. With a spatula press parts of the leaf or glitter deeper into the clay. This way you will make your translucent jewelry even more interesting, and bit shinier. Let it sit for several minutes to allow the liquid clay to level up.
Step 8.
Cure it with a heat gun until become transparent, and let it cool. Carefully, without the stretching, peel the clay sheet from the tile.
Step 9.
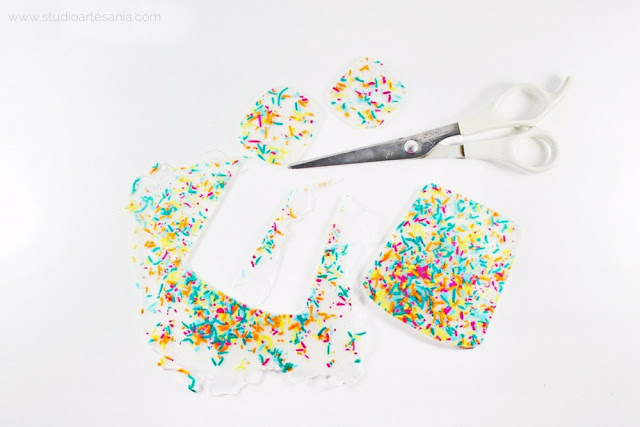
During the cutting keep in mind that flat side of the sheet (the side that was on the tile) is the right side of your piece (the side that everyone will see). The side that was faced toward you when you worked on the piece may be slightly bumpy so it will become a back side (the side that will be close to your skin) of the pendant or earrings. Although that side is bumpy on the look it's smooth to touch and you will not feel a tingling or anything annoying on the skin.
Step 10.
Step 11.
You will notice that the sheet that you made of liquid clay and treated with the heat gun is bit harden and flexible, but know that it is still not fully baked. With the heat gun the clay is just partially cured, but to fully harden it you must bake it in the oven at proper temperature.
So, first preheat oven as directed by manufacturer's guidelines. Preheating of the oven is crucial step to properly bake the polymer clay. When the temperature in the oven is right, bake your jewelry made of liquid polymer clay for minimum 30 minutes (and I always recommend the baking for an hour). To prevent eventual yellowish traces on the liquid clay cover it up with the sheet of baking paper. After you finish the baking let your piece to cool, or to speed the process put it in the bowl of cold water.
If after the final baking in the oven your jewelry lost on transparency a little, which is possible with some brands of liquid clay, treat it with a heat gun again until you can see through it. Then, put the piece in cold water to cool it down. This way you will regain transparency.
Step 12.
Pass the jump rings through the holes, set the chain or earrings hooks, and close them with the pliers. That's it! Your translucent and colorful polymer clay jewelry is ready to wow everyone who sees it.
Tip, tricks, and few ideas
• If you do not have a heat gun and you will use the oven know that the steps to make translucent jewelry are almost the same. The only difference is that after each application of liquid clay, instead of a treating it with the heat gun, you will bake the clay sheet in the oven for 10 minutes. You must use the oven without the fan. So, the process goes like this: make the first layer of liquid clay, add polymer clay chunks, place the tile with the clay in the oven preheated on the recommended temperature of the liquid clay you use, bake for 10 minutes, leave to cool, make second liquid clay layer, bake for 10 minutes, let it cool, apply third layer of liqid clay, add silver leaf or glitter if you wantend to, bake for 10 minutes, let it cool, peel it off, cut it, make the holes and bake again for minimum 30 minutes.
• For this technique, a ceramic tile is an essential tool, especially if you use a heat gun for curing. But, if you do not have a heat gun and you will bake the liquid clay in the oven you can use thicker glass tile. The temperature of baking of polymer clay is to low to affect glass. But, never use the glass tile as a working space if you will treat the liquid clay with a heat gun.
• After every application of liquid clay clean spatula with rubbing alcohol. If you have a lot of excess clay on spatula you can carefully return it into the bottle (you will need to unscrew the bottle cap for this), and then wipe it with a cotton pad on which you added few drops of rubbing alcohol. More tips about cleaning tools used for liquid clay you will find in my tutorial for polymer clay cup and saucer.
• It is best that the thickness of the finished clay sheet is 3 to 5 mm (0.12 to 0.20 inches). If your sheet is too thin, add another layer of liquid polymer clay before the final baking in the oven. But, if it is thicker than the recommended one, do not worry. Although this jewelry may be thicker or big it is very light and you will not feel the weight at all during the wearing.
• This jewelry does not need to be varnished.
If you like this tutorial share it on your favorite social network.
• This jewelry does not need to be varnished.
If you like this tutorial share it on your favorite social network.











0 comments